Tutorial
Overview
ngStartup is an "app boilerplate" suited to create professional applications with AngularJS. It helps you to code better and offers great tools to manage deploy and release stages.
In this tutorial we'll discover how to develop a single app application ready for production, based on a home page, a reserved area (protected by login), and an integration with RESTful resources. We'll use Access Control List to protect different areas of the app. Starting by the master branch, we'll get step by step the final result discovering the major features of ngStartup.
How to start
You need nodejs installed on your machine. Download the ngStartup project on GitHub and install it running the following commands:
$ sudo npm -g install grunt-cli karma bower
$ git clone git@github.com:corley/ng-startup ./tutorial
$ cd tutorial
$ npm install
$ grunt watch
The last command runs a Grunt command that watches the src/ folder (where the sources are) and compiles all files moving them in dist/build/web. At the same time, it runs a local server, so you can visit the app with your browser at http://localhost:8081 (or http://127.0.0.1:8081, it's the same).
Rembember: you code in
src/folder, and Grunt compiles it intodist/build/web
After any changes to the source, grunt compiles again updating the dist. Now you can start to code following next steps.
# Creating a module
Overview
The first step is the creation of a new AngularJS module, then inject it into our app. If you watch at /src/app/index.html and src/app/app.js, you can easily understand that the ng-startup app run on all the html with the major controller AppCtrl.
All modules defined in folder under /src/app/ can be added to the ng-startup application. You can see an example in the /src/app/home, thats is the module that manage the home page of our project.
Adding a new module
The goal now is create a new module called Dashboard, so create the new folder /src/app/dashboard.
When you add a new module, take in mind that all logic and views must be added inside the folder (in this case dashboard). Create two files:
- dashboard.js that contains the module definition and the logic
- dashboard.tpl.html that's the template for the new module.
Your folders should be like this one:
.
├── app.js
├── app.spec.js
├── dashboard
│   ├── dashboard.js
│   └── dashboard.tpl.html
└── home
    ├── home.js
    ├── home.less
    ├── home.spec.js
    ├── home.tpl.html
    └── page.tpl.html
Now we can create the module and its controller:
angular.module( 'ng-startup.dashboard', ['ui.router.state', 'cr.remote'])
.config(function config( $stateProvider ) {
    $stateProvider.state( 'dashboard', {
        url: '/dashboard',
        views: {
            "main": {
                controller: 'DashboardCtrl',
                templateUrl: 'dashboard/dashboard.tpl.html'
            }
        },
        data:{ pageTitle: 'Dashboard'}
    });
})
/**
 * Dashboard controller
 */
.controller( 'DashboardCtrl', ['$scope', '$stateParams', function DashboardCtrl( $scope, $stateParams) {
    $scope.results = [
        {
            "id": 968849,
            "title": "Sunt neque aliquam sint non voluptate amet reprehenderit asperiores delectus recusandae.",
            "summary": "Minus sint delectus quo ipsam tenetur et corrupti explicabo porro itaque reprehenderit est debitis officiis id eaque aperiam laudantium rerum aperiam tenetur voluptatem sint doloribus et suscipit sunt eum provident harum iusto.",
            "timestamp": 1441273351000,
            "author": "user20"
        },
        {
            "id": 258238,
            "title": "Tenetur pariatur quis odit qui aliquid in.",
            "summary": "Iste temporibus dignissimos et ratione quod placeat dolorum fugiat et omnis perferendis modi dolor et officiis nam delectus perferendis vitae debitis accusamus dolorem ad totam.",
            "timestamp": 1440754951000,
            "author": "user9"
        },
        {
            "id": 717454,
            "title": "Eveniet est at hic non optio enim.",
            "summary": "Numquam possimus consequatur ullam amet ex enim assumenda molestiae natus placeat sit sunt ex aspernatur ad numquam saepe deleniti repellendus distinctio minima facilis nihil.",
            "timestamp": 1440668551000,
            "author": "user11"
        },
        {
            "id": 537380,
            "title": "In sit doloremque illo.",
            "summary": "Aut eveniet dolores saepe quas sequi quis minus ut fugit dolores ullam dolor qui reiciendis eveniet nostrum exercitationem ea consequatur magnam tempora quis in veniam nihil in provident totam a exercitationem eos quam possimus placeat consequatur quo non non ab ullam.",
            "timestamp": 1440582151000,
            "author": "user1"
        }
    ];
}]);
The logic of our first module it's very simple:
- we have a new module called
ng-startup.dashboard - it defines in the config a new route strategy: when you visit the #/dashboard
- it run the
DashBoardcontroller - it uses the
/src/app/dashboard/dashboard.tpl.htmlas template - it will inject the compiled view in the
<div ui-view='main'></div>element in our index.html file
- it run the
- in the controller there's a fake service that set a list of news
In order to make this module active, add it the main module in /src/app/app.js:
angular.module('templates-app', []);
angular.module('templates-common', []);
angular.module(
    'ng-startup',
    [
        "...",
        'templates-app',
        'templates-common',
        'ui.bootstrap',
        'ng-startup.dashboard', // add this line
        'ui.router',
        "..."
    ]
)
Now you can add a template to show the news provided by the controller. Open the /src/app/dashboard/dashboard.tpl.html file and add this code (or your own):
<div class="well">
  <p>
    <button class="btn" ng-class="{'btn-success': (order == 'timestamp')}" ng-init="order = 'timestamp'" ng-click="order = 'timestamp'">Order by date</button>
    <button class="btn"  ng-class="{'btn-success': (order == 'title')}" ng-click="order = 'title'">Order by title</button>
  </p>
</div>

<div class="row">
  <div class="col-md-12" ng-repeat="news in results | orderBy : order">
    <h2>{{ news.title }}</h2>
    <p>{{ news.summary }}</p>
    <p class="text-muted">
    published on {{ news.timestamp | date }}
    </p>
  </div>
</div>
We are ready to visit our first controller! Grunt is wathing changes in /src compiling the result in the /dist/build/web, so visit http://localhost:8081/#/dashboard with your browser.
# Working with REST
Overview
In the real life probably we would consume remote resources instead of a list of content defined in the code. The most of angular apps work with API or other remote services. In this tutorial we will use crRemote (based on $http) to work with RESTful endpoints.
Configuring Endpoint
crRemote is injected as dependency in the ngStartup app so it's immediatly available. The first step is set the endpoint. For this tutorial, the http://rest.test.corley.it/news url returns a list of news as defined in the code of previous tutorial.
A brutal way is using the crRemoteProvider in the src/app/app.js file:
.config(['$urlRouterProvider', '$translateProvider', '$authProvider', 'cfpLoadingBarProvider', 'crRemoteProvider', 'appConf', '$logProvider',
  function myappConf($urlRouterProvider,  $translateProvider, $authProvider, cfpLoadingBarProvider, crRemoteProvider, appConf, $logProvider) {

    //... other code

    //set api andpoint by app config
    crRemoteProvider.addEndpoint("default", "http://rest.test.corley.it/");

    //... other code

 }])
The best way is using the app configuration. Edit the /src/common/conf/conf.js file adding your endpoint in the appConf constant.
angular.module('ng-startup.appConf', [])
// env: build
.constant('appConf', {
  "endPoint": "http://rest.test.corley.it/",
  "defaultLanguage": "en_EN",
  "debug": true
})
// endenv
// env: compile
.constant('appConf', {
  "endPoint": "http://rest.test.corley.it/",
  "defaultLanguage": "en_EN",
  "debug": false
})
// endenv
;
As you can see, the constant is defined twice, because the devcode comments will be parsed by Grunt compiling a different configuration for build (under development) and compile (release for production) stages. Edit the endpoint as above, then edit the /src/app/app.js file:
.config(['$urlRouterProvider', '$translateProvider', '$authProvider', 'cfpLoadingBarProvider', 'crRemoteProvider', 'appConf', '$logProvider',
  function myappConf($urlRouterProvider,  $translateProvider, $authProvider, cfpLoadingBarProvider, crRemoteProvider, appConf, $logProvider) {

    //... other code

    //set api andpoint by app config
    crRemoteProvider.addEndpoint("default", appConf.endPoint);

    //... other code

 }])
Creating new services
Now all crRemote services will work with the default endpoint defined in configuration. We can create a service to work with remote news. Add it to your /src/app/dashboard/dashboard.js file or whenever you want inside your project:
.service('NewsRest', ['crRemoteHttp', function(crRemoteHttp){
    var service = crRemoteHttp.createService("news");
    return service;
}])
This snippet creates a service that works with remote resource news on url enpoint + resource name = "http://rest.test.corley.it/news". The methods inherited by crRemote are:
- .get() (HTTP GET /news) or .get({'id': 10}) (HTTP GET /news/10)
- .post({'id': 10, {'data': {'title': 'a', 'summary': 'b'}}) (HTTP POST /news/10)
- .delete({'id': 10}) (HTTP DELETE /news/10)
- .patch({'id': 10, {'data': {'title': 'a', 'summary': 'b'}}) (HTTP PATCH /news/10)
Knowing these methods (each of them returns a promise) you can change the DashboardCtrl in /src/app/dashboard/dashboard.js removing the old list and using the new service:
/**
 * Dashboard controller
 */
.controller( 'DashboardCtrl', ['$scope', '$stateParams', function DashboardCtrl( $scope, $stateParams, NewsRest) {
    NewsRest.get().then(function(res) {
        $scope.results = res.data;
    });
}]);
Refresh your browser and watch the news listed in your dashboard!
# Add Authentication
Overview
Image if the Dashboard that we defined before were a protected area where the user can access only after a successful login. To support this feature, we'll use Satellizer a service to manage authentication, crSession to store user session, and crAcl to check the role of the users. We're going to create a Signin module to let authorized users to log into the reserved dashboard.
Acl
crAcl is a module available in ngStartup that lets you to define roles and visibility in your application. By default is supports 2 (expandables) roles:
- ROLE_GUEST for users not authenticated
- ROLE_USER for users authenticated
The first step is change the configuration in src/app/app.js writing the state for unauthorized roles that try to access to reserved area:
.run(['$rootScope', 'crAcl', 'crSession', 'crRemoteHttp', 'crIdentity', '$state', '$log',
function run($rootScope, crAcl, crSession, crRemoteHttp, crIdentity, $state, $log) {

    //set default login state for unauth users
    crAcl.setRedirect("signin");

    //what append on user successful login
    $rootScope.$on('auth:identity:success', function(event, data) {
      $state.go("dashboard");
    });

    //...

}]);
Two interesting thing on code above:
- all users with no authorizaton that try to access to a protected area will be redirected to the
signinstate - when an event name
auth:identity:successwill be broadcasted (probably after a successful login) the user will be redirected to thedashboardstate
Now edit the src/app/dashboard/dashboard.js file making the dashboard state private. Add ROLE_USER to state definition:
angular.module( 'ng-startup.dashboard', ['ui.router.state', 'cr.remote'])
.config(function config( $stateProvider ) {
    $stateProvider.state( 'dashboard', {
        url: '/dashboard',
        views: {
            "main": {
                controller: 'DashboardCtrl',
                templateUrl: 'dashboard/dashboard.tpl.html'
            }
        },
        data:{ pageTitle: 'Dashboard', is_granted:['ROLE_USER'] }
    });
})
Now if you try to go to the dashboard you'll be redirect to a invalid signin state. You have to create it.
$auth configuration
The next step is create a signin module, but before we have to config our $auth service provided by Satellizer. This module is very easy to use and helps you to create a simple login service with several providers: from Google to Facebook and of course your own authentication service.
As for News resource, the endpoint that we are using serves a login system on the http://rest.test.corley.it/login endpoint. Sending to it a POST request with username and password in the body, we'll obtain a 200 OK response in case of successful authentication, or a 401 UNAUTHORIZED response otherwise. A valid username is user1 and a valid password password1.
So set $auth method in the src/app/app.js file:
.config(['$urlRouterProvider', '$translateProvider', '$authProvider', 'cfpLoadingBarProvider', 'crRemoteProvider', 'appConf', '$logProvider',
  function myappConf($urlRouterProvider,  $translateProvider, $authProvider, cfpLoadingBarProvider, crRemoteProvider, appConf, $logProvider) {

    // ....

    $authProvider.loginUrl = 'http://rest.test.corley.it/login';
    $authProvider.authToken = 'Basic';

    // ....

}]);
In the example above, we are setting the correct endpoint url and the authorization method that will be setted after a successful call to the login endpoint. All $http requests will be firmed with the Basic Auth header.
Signin Module
Now you can create the signin module and add it to the project. Add a folder with two files inside:
.
├── app.js
├── app.spec.js
├── home
├── dashboard
└── signin
    ├── signin.js
    └── signin.tpl.html
The signin.tpl.html with a simple form:
<div class="row">
  <div class="col-lg-4 col-lg-offset-4 col-sm-6 col-lg-offset-6">
    <div class="well margin_50_0">
      <form ng-submit="doLogin(username, password)">
        <div class="form-group">
          <input type="text" ng-model="username" class="form-control" placeholder="username" required>
        </div>
        <div class="form-group">
          <input type="password" ng-model="password" class="form-control" placeholder="password" required>
        </div>
        <p>
          <button type="submit" class="btn btn-success">Click to sign in</button>
        </p>
        <p>
          <small>
            Use <i>user1</i> and <i>password1</i> to sign in.
          </small>
        </p>
      </form>
    </div>
  </div>
</div>
And the signin.js with the module and its controllers:
angular.module( 'ng-startup.signin', ['ui.router.state'])
.config(function config( $stateProvider ) {
    $stateProvider.state( 'signin', {
        url: '/signin',
        views: {
            "main": {
                controller: 'SigninCtrl',
                templateUrl: 'signin/signin.tpl.html'
            }
        },
        data:{ pageTitle: 'Signin' }
    });
    $stateProvider.state( 'signout', {
        url: '/signout',
        views: {
            "main": {
                controller: 'SignoutCtrl'
            }
        },
        data:{ pageTitle: 'Signout' }
    });

})
/**
 * Signin controller
 */
.controller( 'SigninCtrl', ['$rootScope', '$scope', '$stateParams', '$auth', function SigninController( $rootScope, $scope, $stateParams, $auth ) {
    $scope.doLogin = function(username, password) {
        $auth.login({
          username: username,
          password: password
        }).then(function(response) {
            $rootScope.$broadcast("auth:login:success", {'role': response.data.role, 'provider': 'fakelogin', 'user': response.data.identity});
        });
    };

}])
/**
 * Signout controller
 */
.controller( 'SignoutCtrl', ['$rootScope', '$scope', '$state', '$auth', function SigninController( $rootScope, $scope, $state, $auth ) {
    $auth.logout().then(function() {
        $rootScope.$broadcast("auth:logout:success");
    });

}]);
There're two new states:
Signin that shows a signin form and, in case of successful $auth request, broadcasts the auth:login:success event with some data: a role got by endpoint (in this case ROLE_USER), a provider name, and user's data that will be stored into session. This event will be catched by crIdentity, a module available by default in ngStartup, that will use crSession to store user data and will set the role in crAcl, then will broadcasts the auth:identity:success. This event is catched by the $rootScope in src/app/app.js that redirects the user to the dashboard state.
Signout that has not a template but just broadcasts the auth:logout:success: crIdentity will catch it, destroying user's session and role. Then it will broadcasts the identity:purge:success that you can catch in the app.js adding your logic:
.run(['$rootScope', 'crAcl', 'crSession', 'crRemoteHttp', 'crIdentity', '$state', '$log',
function run($rootScope, crAcl, crSession, crRemoteHttp, crIdentity, $state, $log) {

    // ...

    //what append on user logout
    $rootScope.$on("auth:purge:success", function(event, data){
      $state.go("home");
    });

    // ...

}])
Remember that you have to add the ng-startup.signin module to the app in src/app/app.js file.
Now your login system is completed, try it!
# Frontend dependencies
Overview
There are a lot of tools, modules and scripts that you can add to your project. Some of them are not related to AngularJS (such as jQuery), others yes (watch this list for useful modules: awesome-angularjs). Now we would discover how to add an external script (that shows beautiful charts) called Highcharts.js and its angular directive pablojim/highcharts-ng.
Bower
Bower is a dependency manager that helps you to define the external tools you want to integrate into your app. You have to download the packages highcarts and highcharts-ng. To do that add them to bower.json:
  "dependencies": {
    // ...
    "highcharts": "~4.1.8",
    "highcharts-ng": "~0.0.11",
    // ...
  }
The run this command in the shell:
$ bower update
Bower will download this files into bower_components/ folder.
Add the libraries to your projects
Now you're in a strange situation: the libraries are in bower_components, but you cannot use them because the app in src/ doesn't know how to.
In config/build.config.js there are several lists that define which external js and css files must be added to the src/index.html during compiling and building phases.
Add the new dependencies to them:
  vendor_files: {
    js: [
      // ...
      'bower_components/highcharts/highcharts.src.js',
      'bower_components/highcharts-ng/dist/highcharts-ng.js',
      // ...
     ]}
Now when you run grunt build:web (and all other tasks) this files are added to others already defined.
Inject the new dependency
If you added an Angular module as highcharts-ng, you have to add it to the project dependencies src/app/app.js:
angular.module('templates-app', []);
angular.module('templates-common', []);
angular.module(
        'ng-startup',
        [

            // ...
            'highcharts-ng',
            // ...
        ])
Using the new module
Here a simple example of usage. Add it to your Dashboard Controller:
  $scope.chartConfig = {
    options: {
        chart: {
            type: 'bar'
        }
    },
    series: [{
        data: [10, 15, 12, 8, 7]
    }],
    title: {text: 'Hello'},
    loading: false
  };
and call the directive in the dashboard template:
<div class="row">
    <div class="col-md-12">
        <highchart id="chart1" config="chartConfig" ></highchart>
    </div>
</div>
Now your dashboard should show a list of news and a chart with fake data.
# Custom paginator
Overview
Watch at news listed: they are a lot! We're going to add a paginator that works with remote resouce. The http://rest.test.corley.it/news endpoint retuns all news (approx 200), but if you add the query param page, it will return only 10 news: https://rest.test.corley.it/news?page=1. The body response is always a list of news (but less then before) and in the headers response there are useful infos about the number of items returned:
- x-count: the number of items returned, 10 by default
- x-total: the number of total items, 200 by default
- x-page: the page number you required, for example 3
- x-from: the first item returned, for example 21
- x-to: the last item returned, for example 30
- x-next: the number of the next page (or 0 if the page required is the last one)
- x-prev: the number of the previous page (or 0 if the page required is the first)
The logic of this headers can change on different remote services. The goal is create a service that can adapt to the response in order to manage properly the pagination.
Build the service
The paginator is a reusable module. So add a new folder to src/common with this files:
.
└── paginator
    ├── paginator.js
    └── paginator.tpl.html
The service inside paginator.js must contain two services: a directive that will show the paginator using the paginator.tpl.html and a function injected to crRemote as interceptor. In this way when your NewsRest service (created in previous tutorials) will make a call, the interceptor function will transform the data managing the pagination. This is the code:
angular.module('ng-startup.paginator', [
    "cr.remote"
])
.config(['crRemoteProvider', function paginatorConf(crRemoteProvider) {
  crRemoteProvider.addResponseInterceptorSuccess("paginator", function(data){
      var limit = 10;
      var headers = data.headers();
      var pager = false;
      if(headers && headers['x-count']) {
        pager = {
          pages: 0,
          page: 1,
          last: false
        };
        pager.count = parseInt(headers['x-count']);
        pager.total = parseInt(headers['x-total']);
        pager.from = parseInt(headers['x-from']);
        pager.params = data.config.params;
        pager.to = parseInt(headers['x-to']);
        pager.page = parseInt(headers['x-page']);
        pager.next = parseInt(headers['x-next']);
        pager.prev = parseInt(headers['x-prev']);
      }
      return {
        "data": data.data,
        "headers": data.headers(),
        "status": data.status,
        "pager": pager
      };
    });
}])
;
As you can see, the interceptor function read the response headers and return the original data and a new object named pager with pagination fields inside.
The directive will use this data:
.directive('paginator', ['$state', function($state){
    return {
        restrict: "E",
        templateUrl: 'paginator/paginator.tpl.html',
        replace: true,
        scope: {
          state: "=",
          stateParams: "=",
          pageInfo: "="
        },
        link: function (scope) {
            scope.$watch('headers', function (headers) {
              scope.go = function(page) {
                if(!scope.stateParams) {
                  scope.stateParams = {};
                }
                scope.stateParams.page = page;
                scope.pageInfo.page = page;
                $state.go(scope.state, scope.stateParams);
              };
            });
        }
    };
}]);
Now define the pagination template:
<nav>
  <ul class="pagination">
    <li class=""><a href="#">{{ pageInfo.total }} trovati</a></li>
    <li class="" ng-show="pageInfo.prev"><a ng-click="go(pageInfo.prev)">indietro</a></li>
    <li class="active"><a >pagina {{ pageInfo.page }}</a></li>
    <li class="" ng-show="pageInfo.next"><a ng-click="go(pageInfo.next)">avanti</a></li>
  </ul>
</nav>
Use it
Go to src/app/dashboard folder. Here you have to change something to start usinn the new paginator.
Add the new interceptor to NewsRest:
.service('NewsRest', ['crRemoteHttp', function(crRemoteHttp){
  var service = crRemoteHttp.createService("news", {
    responseInterceptorSuccess: 'paginator',
    auth: true
  });
  return service;
})
Then change the Dashboard Controller and its state in order to add a page parameter in url.
angular.module( 'ng-startup.dashboard', ['ui.router.state', 'cr.remote'])
.config(function config( $stateProvider ) {
  $stateProvider.state( 'dashboard', {
    url: '/dashboard?page',
    views: {
      "main": {
        controller: 'DashboardCtrl',
        templateUrl: 'dashboard/dashboard.tpl.html'
      }
    },
    data:{ pageTitle: 'Dashboard', is_granted:['ROLE_USER'] }
  });

})
/**
 * Dashboard controller, reserved by Acl
 */
.controller( 'DashboardCtrl', ['$scope', '$stateParams', 'NewsRest', function DashboardCtrl( $scope, $stateParams, NewsRest ) {
  if ($stateParams.page === undefined) {
    $stateParams.page = 1;
  }

  NewsRest.get({params: {"page": $stateParams.page}}).then(function(res) {
    $scope.results = res.data;
    $scope.pager = res.pager;
  });

  $scope.state = "dashboard";

}])
As you can see, the new route accepts a page number (/dashboard?page=3) and this value is passed to the controller and used by the NewsRest service to make the GET call.
You should see less news in your browser, just 10 instead of 200. Call the paginator directive in your dashboard template to complete this tutorial:
<div class="row">
  <div class="col-md-12" ng-repeat="news in results | orderBy : order">
    <h2>{{ news.title }}</h2>
    <p>{{ news.summary }}</p>
    <p class="text-muted">
    published on {{ news.timestamp | date }}
    </p>
  </div>
</div>

<paginator ng-if="pager" page-info="pager" state="state" state-params="stateParams"></paginator>
Plase note that the directive accepts state and params in order to call the right route when user clicks on previous and next page links.
# Phonegap
Overview
Okay, your app is ready and works perfectly in web browser. You have a signin page, a reserved area and remote resources accessible via http. It's the moment to create a mobile version of your website for Android and iOS devices. Please register on Phonegap, it's free.
Configuring Phonegap
ngStartup has a Grunt task named grunt compile:mobile that compiles your application then uploads it to Phonegap to get back the app sources for Android and iOS. To make it possible, you need to fill the config/secret.json file with some credentials that you can find on Phonegap. Remember that the secret file is out of version (listed in gitignore) in order to prevent accidental credentials distribution.
Go to your account area in Phonegap and get the app key and the access token (from account label)
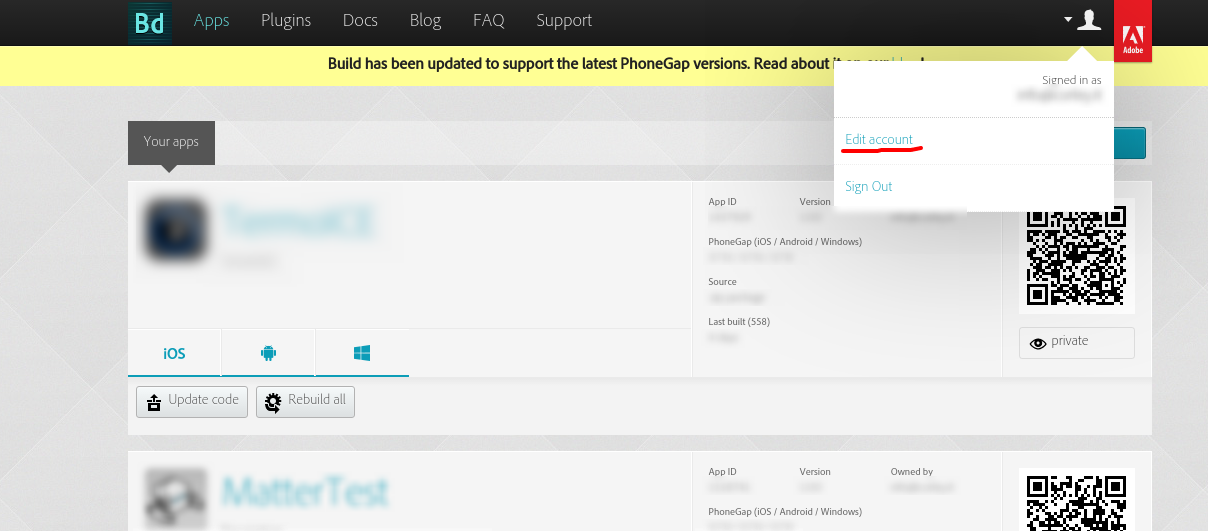
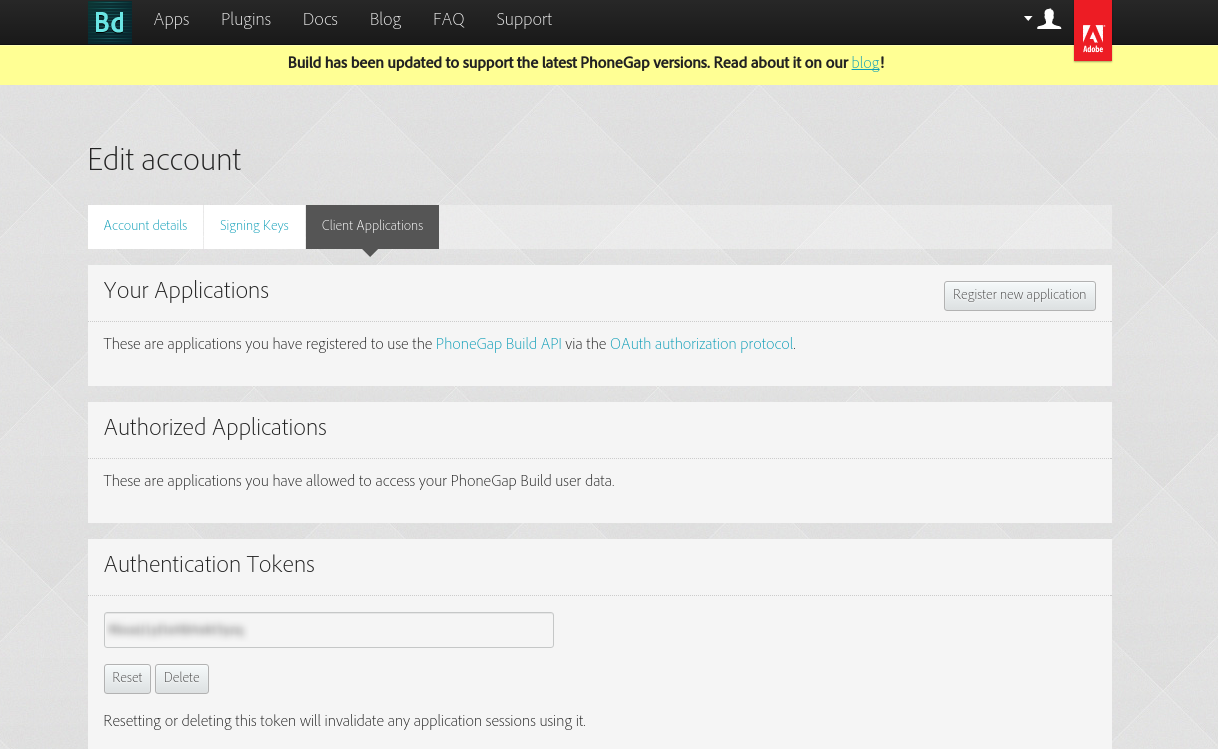
then add them to the config/secret.json file:
{
  "aws": {
      "accessKeyId":  "",
      "secretAccessKey": "",
      "bucket": "",
      "region": ""
  },
  "phonegap": {
      "appId": "123456789",
      "token": "xxxyyyzzz",
       "keys": {
          "ios": { "password": "" },
          "android": { "key_pw": "", "keystore_pw": "" }
      }
  }
}
You have also to change the config/phonegap.config.xml as specified on official documentation. The default file is okay for a test, but remember to change at least the app name. Find and replace CHANGEWITHYOURAPPNAME in the file.
Use ngCordova
ngStartup uses by default ngCordova, a set of angular modules that wrap several Phonegap plugins making them easy to be used in your application. Whne you want to use a plugin, add it to config/phonegap.config.xml, and change the index.html. For example, if you want to use the Globalization Plugin, add it to the config/phonegap.config.xml:
<gap:plugin name="org.apache.cordova.globalization" version="0.3.1" />
then add the cordova javascript files in the src/index.html:
<head>
  <!-- devcode: phonegap -->
  <script type="text/javascript" src="cordova.js"></script>
  <script type="text/javascript" src="globalization.js"></script>
  <!-- endcode -->
</head>
Phonegap/cordova will add these files to your project during building. Remember that the devcode comments reserves the lines of codes to grunt build:mobile and grunt compile:mobile releases, cutting them in web stage.
Now you can add your login inside your scripts, for example in src/app/app.js:
.run(['$rootScope', 'crAcl', 'crSession', 'crRemoteHttp', 'crIdentity', '$state', '$log', '$cordovaGlobalization',
function run($rootScope, crAcl, crSession, crRemoteHttp, crIdentity, $state, $log, $cordovaGlobalization) {

  //phonegap callback on device ready
  document.addEventListener("deviceready", function() {
    $cordovaGlobalization.getPreferredLanguage().then(
      function(result) {
        //ok
      },
      function(result) {
        //err
      }
    );


  });

}])
Compile the app
When you're ready, run the grunt compile:mobile to create the version and upload it to Phonegap. The process can take few minutes, then Grunt will donwload the apps and install it on your Android device (if connected on usb). You can try your app on your phone and if you want watch logs running the task grunt shell:androidLogs